I’m sure that you’ll agree with the fact that a functioning shower not only provides a touch of stress relief and relaxation on our hectic life schedule, but it is also the best place for personal grooming and healthy lifestyle practice. Showering is the base of human hygiene practice and has now turned into more classy, artistic, and enjoyable.
Installing showers can become a complicated and expensive task if it is not done properly. Before proceeding with shower installation, it is important to understand the basics and avoid some common mistakes.
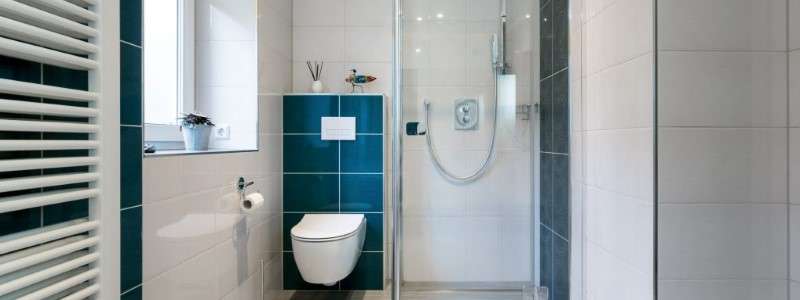
We’ll talk about the different types of showers you can choose from, how to plan ahead, how the shower base installation goes, and how to install a shower and its components like a pro. So, let’s get right into it!
Types of Showers Available
There are a variety of types of showers available these days. You can choose from basic fiberglass shower stalls to more luxurious steam rooms and even walk-in showers with spa-like features!
Depending on lifestyle, culture, and modern home architecture ideas, as well as aesthetic value, modern showers are flexible to use and easy to function according to need and space. Let’s explore the different types of showers you can install at your property.
- Walk-in Showers: These showers are becoming more and more popular these days as they offer a luxurious, spa-like feeling. They are usually large in size but can also be installed in smaller bathrooms if necessary. If you’re a fan of minimalistic outlooks, walk-in showers are the best solution for you. These are safe for seniors, and suitable for common public use.
- Corner Showers: This type of shower is ideal for small bathrooms. As the name suggests, they take up a corner of the bathroom, leaving room to install other fixtures in the remaining space. These showers are especially handy in places where you have less available space.
- Electric Showers: This type of shower consists of a self-contained unit that heats water. This type of shower is ideal for those who want a powerful and luxurious showering experience. They are easy to install and come with adjustable temperature settings, letting you choose the perfect temperature for every occasion.
- Mixer Showers: With both existing built-in systems for hot and cold water, mixer showers are controlled by a single valve that mixes water at the temperature you wish. If you have high water pressure, manual or thermostatic options are also available. It combines hot and cold water to bring the desired temperature of the water as per need.
- Power Showers: This type of shower has an integrated pump that boosts the water pressure. You can also get a more comfortable bath experience with this, even in a low water pressure supply. A power shower is ideal for those who want a powerful, high-pressure showering experience.
- Digital Showers: Using a customized control system with the modern technology touch, this type of shower system will save your water and provide a luxurious experience.
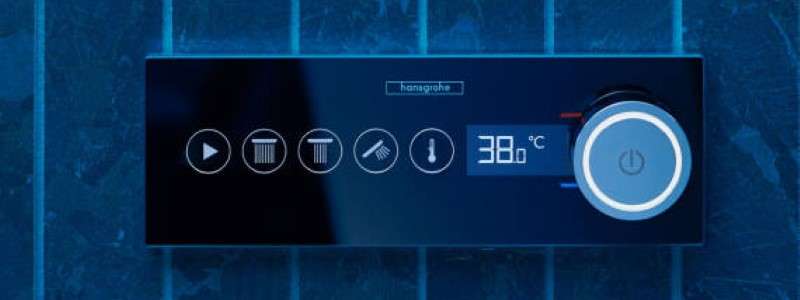
In some cases, there are also remote control systems for temperature and water control. Digital showers are the latest trend and come with various features such as wireless control, temperature regulation, etc.
- Wet Rooms/ Shower Booths: With a shower area and bathroom, a wet room is surely the best combination that meets everyone’s needs. They are the perfect solution for those who want both a shower and a bathtub in their bathroom. Wet rooms or shower booths are waterproof and easy to maintain, making them an ideal choice for modern households.
- Enclosed Showers: Enclosed showers are perfect for those who want to keep their showering area enclosed. They come with a variety of features such as glass panels, sliding doors, and so on.
These are some of the most widely used types of showers across the globe. Once you have picked the right type of shower for your home/office, it’s time to head into action. Let’s discuss how you can install showers on an easy-to-follow, step-by-step guide.
How to Install A Shower: Step-By-Step Process
Shower installation is a long process and requires attention to detail. Here is a step-by-step guide that you can follow for successfully installing a shower in your home/office:
Step 1: Planning The Installation
Before the process of installing the shower, it is wise to go with these planning outlines:
- Determine the location: First of all, you have to ensure where you want to set up your shower and where it is flexible to use. Additionally, it is better if you decide to set it up alongside the water supply line. Check the existing plumbing if it suits your idea.
- Choose a shower type: You have already known the most common types of showers you can install. Inspect the available space, your budget, and plans to identify the perfect shower type for you.
- Settle on shower enclosure: Take time to decide and measure the shape, installments, decoration materials of your shower setting. Additionally, it is also wise if you consider what type of standalone shower unit or a customized shower you need.
- Check supply and drainage: Supply and drainage is also another factor that plays an important role in your installation procedures. To make sure you don’t overload the handle capacity, check your drainage, as well as water supply lines.
Step 2: Preparation
Once you are done planning everything out, it’s time to move on to the second step, which is preparation. Here are a few things that you need to do:
- Purchase the Necessary Equipment: To make sure your installation process goes smoothly, you’ll need to gather all the necessary equipment before the installation process begins. This includes the chosen shower unit, pipes, and other related materials.
Invest to purchase quality materials as per renowned brands or from your expert’s suggestion, which will save both you and your wallet from further damage. - Install and Test the Shower: This is the step where you will start to install your shower. The process will vary depending on the location and complexity of the job. Don’t forget to test the unit after the installation to make sure it is working perfectly.
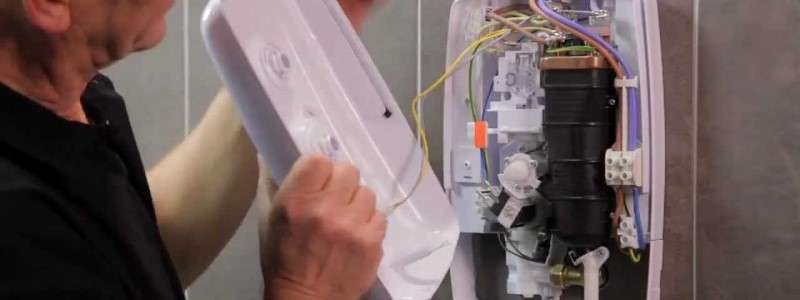
- Check The Wiring: In case you are installing an electric shower, make sure that you check the wiring for any potential problems. Don’t forget to wear protective gloves and goggles when dealing with electricity.
- Finishing and Cleaning: Once the installation process is complete, it’s time to finish up and clean everything. This includes adding the finishing touches such as sealing the joints with caulk and silicone sealant. You should also check for any leaks or areas that need more attention before you move on to cleaning.
- Secure Professional Backup: Though the above-mentioned steps are simple and easy to follow, it is always advised to go with a professional installation service in case you face any difficulties. Professional plumbing services can also help you to best implement your ideas into a working solution.
Now, let’s get on with the more technical part of the process, the installation.
Step 3: Installing a Shower Base
The installation of the shower base is one of the most important steps in installing a shower. The shower base is typically made of ceramic, fiberglass, acrylic, or composite materials. The main job of a shower base is to support the whole structure. Here’s how to install a shower base:
- Prepare the Floor Area: Before you start to install anything, make sure that your floor is sturdy and leveled. This will ensure that your shower base is secured and sits properly on the ground.
This includes checking the subfloor, plumbing lines, and flooring fixtures. Make sure to repair all the damages or uneven surfaces. Also, get rid of the old condition. - Shower Drain Installation: The drain is the most important element when it comes to shower installation. You’ll need to cut a hole at a corner of your floor base and attach a plumbing line for the shower drain installation.
The drain should fit properly into the floor and pipe so that water can flow freely. Make sure that you tighten the nuts properly in order to avoid any leakages.
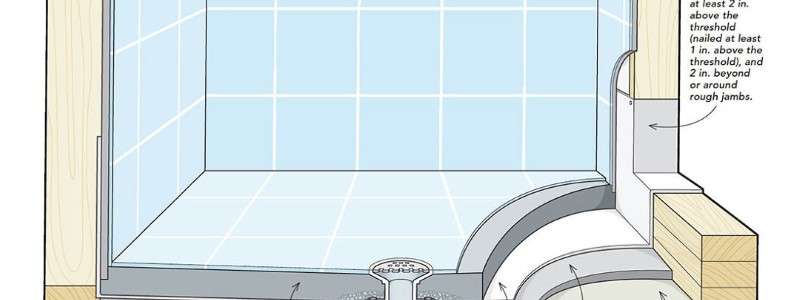
Double-check the strainer, the rubber gasket, and the compression fitting to confirm if there is any leak or fracture. Once the shower drain installation is complete, move on to the next phase.
- Laying Down the Shower Base: Once the drain is in place, you can start to lay down the shower pan. Make sure that it is properly aligned and held up with a few pieces of 2×4 wood. Secure the pan using either construction adhesive or concrete screws. Install the base as per the manufacturer’s instructions and local plumbing regulations.
- Sealing the Shower Base: After you secure the shower base, make sure to seal it with caulk or silicone. This will protect your pan from water damage and ensure a tight fit. You can also use chemical sealant to ensure there are no leakage issues.
- Install the Shower Walls and Fixtures: Now that you have laid down the shower base, it’s time to install the walls for your new shower. This will involve measuring and cutting wall panels before screwing them into place. Remember, move into the installation only after the sealant has dried completely. Once you are done with the walls, it’s now time to add in all the fixtures and pipes that connect the shower to your plumbing system. Make sure that all the connections are tightly secured and connected to the right valves or pipes.
- Trial and Check: Before you can call it a day, make sure that you test the shower. This includes running the water to check for any potential leaks or blockages. If there are no problems, then you can finally enjoy your brand-new shower.
Step 4: Finishing Touches
Now that you have installed a shower, it is time to make sure everything looks as perfect as possible. You will need to finish off the installation with some of these final touches:
Installing Shower Doors
If you plan on installing shower doors, now is the time to do it. It is important to install them correctly so that they fit securely and look great. You can also choose from a variety of styles such as frameless or framed glass or even sliding doors.
Make sure the setting, and attachment are well settled so there is no risk of damage or accident. It’s wise to choose a lightweight door, panel, or partition for your shower. If you want to save a few bucks, you can opt for PVC doors. Glass doors can provide a cool aesthetic outlook to your shower.
Grouting and Sealing of Shower Tiles
After you install the shower, it is time to grout and seal the tiles. This will help to prevent water seepage between the tiles and keep your shower looking neat. You can use a variety of grouts such as epoxy-based or cement-based ones.
Make sure that you let them dry for at least 24 hours before you start to apply the sealant. This will help to protect your tile from damage and maintain its appearance for years to come.
It’s better to use sealant and fasteners as per expert recommendation. Follow the instruction manual or talk with local expert plumbers for pro tips and tricks.
Adding Accessories
There are plenty of shower accessories that can enhance the look of your bathroom. You can add in a stylish shower head, or install an adjustable or handheld shower head. You can also install a built-in shelf or grab bars for added convenience.
These accessories can also provide extra comfort, luxury, and style to your bathroom while making it look more inviting. Choose the right accessories to get the most out of your shower installation experience!
Final Inspection and Maintenance
Now that your shower is installed, you will need to make sure it stays in good condition for years to come. Regular cleaning and maintenance are essential for a long-lasting and efficient shower system.
Start off by cleaning the tiles regularly with a mild detergent or scrub brush. Make sure to check all the fixtures, pipes, valves, and connections for any signs of damage or wear.
You should also look out for leaks, clogs, and mold. If you notice anything out of the ordinary, it is always best to call in a professional plumber for help.
Don’t forget to inspect your shower every few months to make sure it is functioning properly. This will help you catch any issues early and prevent them from becoming bigger problems down the line.
Here’s a video guide (time-lapse) simplifying the shower installation process.
Congratulations! Now you have a solid idea about how the shower installation process goes. Installing a shower can be a long and tedious task, but with the right tools and knowledge, it can be done quickly and easily. Just follow these steps, and you will soon have a beautiful new shower of your own!
Professional Shower Installation Service in Toronto
When it comes to installing a shower, you might want to consider hiring a professional installation service. In Toronto, there are plenty of experienced and qualified plumbers who can provide the installation and maintenance services you need.
These professionals will have all the knowledge and tools needed to safely install your shower system. They will also be able to give advice on how best to maintain and clean your new shower for years of hassle-free use.
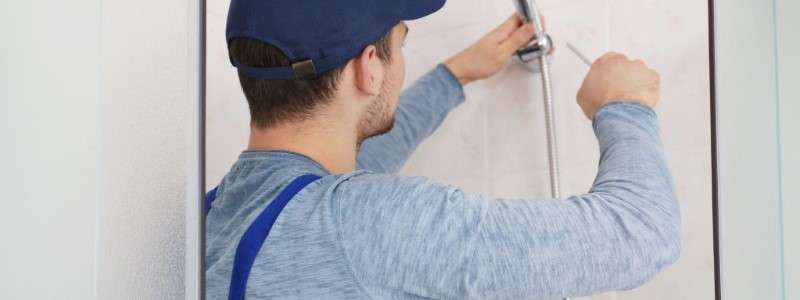
If you’re searching for professional installation service here in Toronto, Citizen plumbing can provide the best “24 hour plumber Toronto” you are seeking. With over 25 years of experience, we are a trusted name in the plumbing industry.
We also offer services like home renovation plumbing, pipe installation, drain unclogging, pool installation, and many more. Our skilled plumbers can help you with any of your plumbing needs any time of the day!
Contact us today to learn more about our services, or to book an appointment for shower installation. We’ll be glad to help you out. Click here for securing your free estimation!
Epilogue
And with that, we’ve reached the end of our today’s discussion. Today, we’ve talked about choosing the right shower, planning ahead, shower base installation, and decorating your shower. We’ve tried to keep it simple. If you have any further queries, feel free to contact us.
We hope that the information we have provided here helps you to understand better about the shower installation process and will assist you in making an informed decision regarding your plumbing needs. Thanks for reading this far, and I wish you all a great weekend ahead!


 by
by