Considering the direction of flue gas traveling, this may sound counterproductive to you, but for wood stove pipe installation, the most effective way is to settle the male end of the pipe, always pointing at the stove for wood burning!
Yes. you are reading it right. By doing this, your burnt gas will flow towards the outside direction and not come back through the wood stove pipe, eliminating smoke in your stove.
The wood stove pipe installation process may seem difficult, but with this method, your wood stove pipe installation will be hassle-free and you can set it up quickly.
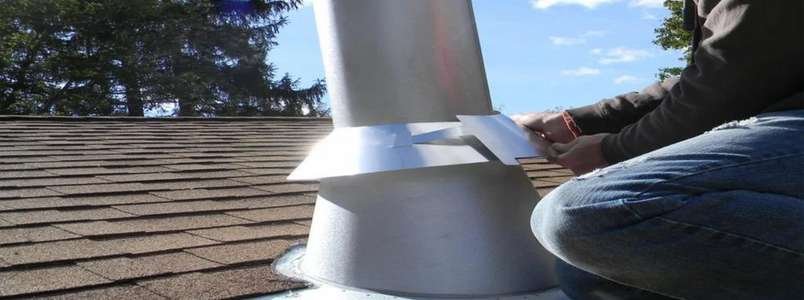
Welcome to our today’s guide on Wood Stove Pipe Installation.
Here we’ll discuss all you need to know about the stove pipe installation process. We’ll also explore the best ways of installing wood stove pipe through walls, wood stove pipe requirements, and the proper way of installing wood stove pipe through roofs.
Without any further ado, let’s jump right in!
Stove Pipe Installation: A Brief Introduction
Installing Wood Stove Pipe Through Wall
Installing a wood stove pipe through a wall can be a daunting task, but with the right tools and instructions, it will be much easier. Let’s learn how to install stove pipe through walls.
The first step to installing a wood stove pipe is to measure the area where you will install it. Make sure that there is enough room for the pipes, fittings, and insulation to fit properly.
Once you have the measurements, you will need to purchase the appropriate size pipe and fittings.
When installing a wood stove pipe, you should use a metal wall thimble as well as an approved vent cap on the outside of your home.
The wall thimble is used to create an airtight seal between the inside and outside of your house. It is important to select a wall thimble that is designed for the type of pipe you are using.
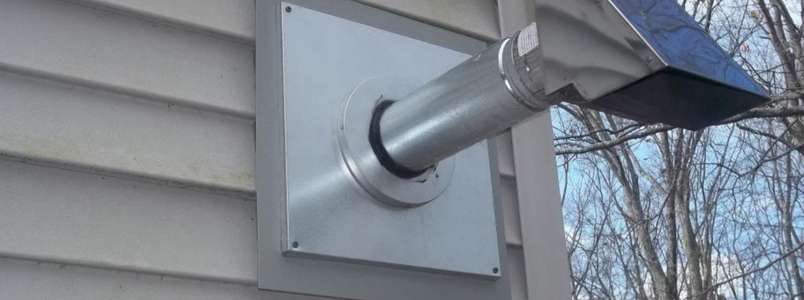
Next, begin to install the pipe. Start by cutting the hole in your wall where you will be inserting the pipe. Be sure that it is large enough to accommodate all of the necessary parts and pieces. Seal up any gaps around the edges of the hole using fire-proof caulking.
Once everything is in place, you can begin to attach your vent pipe to the wall thimble. Make sure that all of the necessary fittings are securely fastened and sealed with high-temperature silicone caulk.
The last step is to connect the vent cap on the outside of your house and then it’s time to fire up the wood stove!
When you are finished, make sure that your installation has been inspected by a qualified professional before use.
This will ensure that everything is properly sealed and installed correctly. Once your new wood stove pipe is in place, you can rest assured knowing that your home is safe and warm.
Installing Wood Stove Pipe Through Metal Roof
Now that you know the best ways of installing wood stove pipe through walls, how about installing wood stove pipe through roofs? Let’s find out
Installing wood stove pipe through metal roofs is a bit trickier. Here, you have to take accurate initiatives for certain materials of your roof.
There are several potential challenges when installing a wood stove pipe through a metal roof, such as creating an airtight seal between the pipe and the roof to prevent leaks.
To ensure that your wood stove installation is safe and efficient, it is important to take the time to properly install your wood stove pipe.
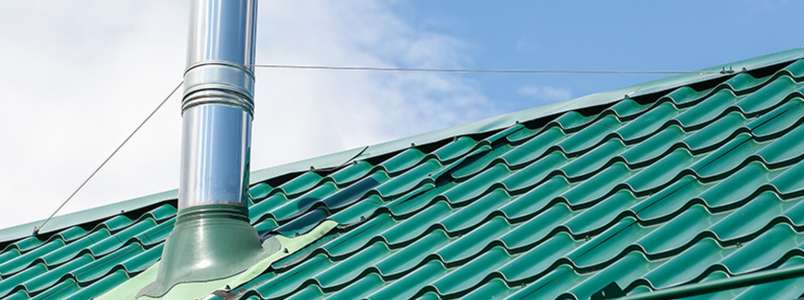
Before beginning, consult with a professional roofer or builder to make sure that your installation meets all applicable building codes and safety regulations. Here’s how to do it:
Step 1: Choose the Right Pipe
The most common type of pipe used in installations through metal roofs is double-walled stainless steel.
This type of pipe is non-combustible and provides a good seal against moisture, snow, and other elements.
Step 2: Measure the Distance
Measure the distance from your wood stove to the closest point on your metal roof to determine how many sections of pipe you will need.
Depending on drain locations, you may also need additional fittings and adapters.
Step 3: Cut the Hole
Once you have determined how many sections of pipe are needed, it is time to cut a hole in your roof for the pipe to pass through.
Before cutting, ensure that the area around the pipe is clear of any combustible materials such as wood or insulation.
Step 4: Install the Pipe
Begin to install the pipe from inside the attic or other space below your roof. Secure each section of pipe with metal straps and fasten them to the joists in your structure.
Make sure that all sections are properly sealed together and make sure that they fit snugly against the hole in your roof.
Step 5: Seal the Pipe
Once the pipe has been installed, it is important to create an airtight seal between the metal roof and the pipe.
Use a high-temperature silicone sealant or metal flashing tape to cover any gaps. This will also help keep out moisture and debris.
Congratulations. Now you know the best ways of installing wood stove pipe through roofs. However, what if you live in an apartment, where you need to connect your stove pipe to the chimney?
Follow along to learn how to install stove pipe into chimneys.
How to Install Stove Pipe Into Chimney
Installing a stove pipe into your chimney requires some careful measurements and careful planning. Here are the steps you need to take:
- Measure the inside diameter of your chimney flue and purchase a stove pipe that fits snugly inside it. The inner diameter of the stove pipe should be no more than 1/2 inch smaller than the inside diameter of your chimney flue.
- Measure the length of the stove pipe needed and cut it to fit. Make sure that you leave a gap between each section of the pipe to allow for expansion due to heat changes. It is advisable to use two pipes if you are going up more than 10 feet as this will reduce the risk of overheating.
- Secure each section of pipe together with steel screws and sealant. Make sure to use a heat-resistant sealant that is designed for high-temperature applications, as this will prevent any smoke leakages.
- Install the top plate onto the chimney flue using masonry screws, ensuring that it fits snugly and is secure.
- Secure the stove pipe to the top plate using steel screws and sealant. Make sure to use a heat-resistant sealant as this will ensure a tight seal between the two surfaces.
- Connect the other end of the stove pipe to your stove using the appropriate connectors.
- After all the connections are secure, fire up your stove and check for smoke leakage at any of the joints. If you find any leaks, reseal the joint using a heat-resistant sealant.
Natural Gas Pipeline Installation
Natural gas pipelines are used to transport natural gas from its sources, such as a well or a processing plant, to its end users, such as homes, businesses, and power plants.
The natural gas pipeline installation process is also a matter of concern for citizens too.
Here we will also discuss the process of natural gas pipeline installation. Installing a natural gas pipeline involves several steps:
- Planning and preparation: This involves identifying the route for the pipeline, obtaining necessary permits and approvals, and making any necessary arrangements with landowners and other stakeholders.
- Clearing and grading: The route for the pipeline must be cleared of vegetation and debris, and the ground must be graded to provide a level surface for the pipeline.
- Trenching and bedding: A trench is dug for the pipeline, and a bed of sand or gravel is placed in the bottom of the trench to support the pipeline.
- Laying the pipe: The pipe sections are welded together on site and then lowered into the trench. The pipe is typically made of steel or plastic, and it may be coated with a protective material to prevent corrosion.
- Backfilling and compaction: Once the pipe is in place, the trench is backfilled with soil and compacted to provide support for the pipe.
Testing and commissioning: The pipeline is tested to ensure that it is functioning properly and meets safety and regulatory standards.
Double Wall Stove Pipe Clearance Canada
In Canada, the minimum clearance between a double-wall stove pipe and any combustible material is typically 6 inches (15 cm). This includes the walls, ceiling, and any other objects in the room. This is known as the “double wall stove pipe clearance Canada”.
It is important to follow these clearance requirements to reduce the risk of a fire. You should also follow the manufacturer’s installation instructions for your specific stove and stove pipe, as they may have additional requirements or recommendations for clearance.
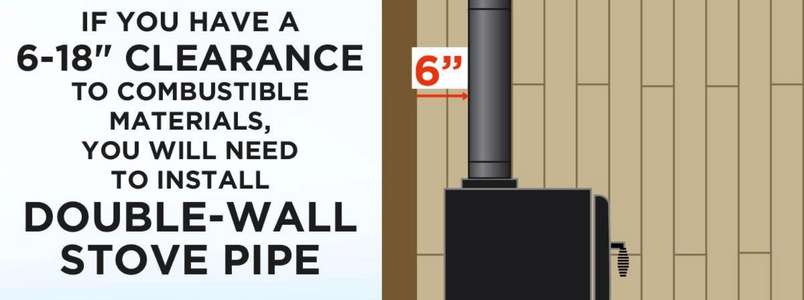
Additionally, Check with your local building codes and regulations to ensure that you are in compliance with all safety requirements.
If you’re installing wood stove pipe through metal roofs in Canada, Check the “double wall stove pipe clearance Canada” out.
In Canada, the National Building Code (NBC) and the National Fire Code (NFC) outline the requirements for the installation of wood-burning stoves and fireplaces, including the clearance distances for stove pipes.
Wood Stove Pipe Installation: Pro Tips And Tricks
Here are some Pro tips that might help you when you are installing wood stove pipe through walls or roofs:
- Use high-quality mounting hardware to secure the wood stove pipe to the stove and the chimney. This will ensure that the pipe is stable and won’t come loose during use.
- Use a pipe sealant to seal all joints in the wood stove pipe. This will help to prevent leaks and ensure that the pipe is airtight.
- Test the wood stove pipe for leaks before using the stove. You can do this by lighting a small fire in the stove and checking for any smoke or gasses escaping from the pipe.
- Regularly inspect and maintain the wood stove pipe to ensure that it is in good working order. This includes cleaning the pipe and checking for any damage or wear.
Wood Stove Pipe Requirements
When installing a wood stove, the proper pipe and fittings are necessary to ensure that it is installed correctly and safely.
In general, there should be a minimum of 18 inches of clearance between the stove and any combustible materials such as walls or furniture.
Here are the wood stove pipe requirements you’ll need to worry about when you are learning how to install stove pipe through walls:
1. All pipes must be constructed of heavy gauge steel and pass the ULC standards.
2. Each joint should be secured with at least three sheet metal screws to ensure a secure fit.
3. All pipe sections must extend beyond the interior wall by at least 6 inches and terminate above the roofline or, in some cases, extend all the way through the roof.
4. All pipe sections must be painted with high-temperature paint, such as stove black paint, to protect against corrosion.
5. If using double-wall insulated pipe, make sure that the insulation is rated for wood stoves and not just for gas or oil-burning units.
6. When connecting the stove to the chimney flue, use a Storm Collar to provide an airtight seal and prevent moisture from entering the pipe.
7. Install a Chimney Cap on all masonry chimneys, as this will help keep rain and snow out of the chimney.
Now that you know how to install stove pipe through walls, and what are the wood stove pipe requirements, it’s important to know that you’ll need professional service sometimes, Here’s how to go about it:
Professional Stove Pipe Installation Service Provider In Florida
Professional plumbers ensure that all safety standards laid down by the local building code or report are adhered to when installing or replacing a stove pipe system. Read this woodstoves safety measures.
These agencies or individuals have the right tools, supplies, and knowledge to do a clean and efficient job of installing your new stove pipe system. They can also help you select the right type of pipe, vent, and accessories to fit your specific needs and requirements.
They will also provide advice on how best to ventilate the area around your stove pipe to reduce smoke, heat, and odors.
They will make sure that your stove pipe system is installed correctly and safely, so it can provide the best possible performance for years to come.
Professional stove pipe installation service providers are also experienced in inspecting and servicing existing stove pipes. They can inspect and repair any damage or corrosion caused by improper installation or management.
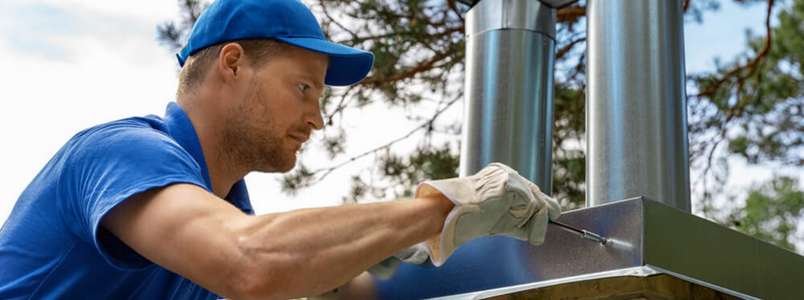
If you’re searching for a 24 hour plumber here in Toronto, Citizen Plumbing is here to help. We’re a Premier plumbing Service provider that can help you with your every plumbing need.
Whether you want general plumbing services like, stove pipe installation, home renovation plumbing, A/C installation and repair, or pool installation services, we’re here to provide the best quality service at the best price. Contact us for any of your plumbing-related issues.
Thanks for reading this far. Through this article, we’ve tried to provide a general outlook on the stope pipe installation process.
We answered questions like how to install stove pipe into chimneys, how to install stove pipe through walls, what is the double wall stove pipe clearance Canada, and what is the process of installing wood stove pipe through roofs. You can always find the best plumbing companies in Toronto that can help you up with the stove pipe installation.
Hopefully, this article will provide valuable information on the stove pipe installation process. Thanks for reading this far. I wish you a great holiday season and good luck!




 by
by